Cleaning your cat’s ears is an important part of basic grooming, yet many cat owners are unsure about how to do it safely. Cats are very clean animals and spend a lot of time grooming themselves, but their ears still need attention from time to time. Dirt, wax, and debris can slowly build up inside the ears, especially in cats with folded ears or those prone to allergies. If this buildup is ignored, it can cause discomfort, itching, or even painful infections.
Learning how to clean your cat’s ears the right way helps keep them healthy and comfortable. When done gently and only when needed, ear cleaning can become a simple part of your cat’s care routine without causing stress or fear.

Why Ear Cleaning Is Important for Cats
Healthy ears play a big role in your cat’s overall well-being. Clean ears allow your cat to hear clearly and stay comfortable throughout the day. When wax and dirt build up, they can trap moisture and bacteria, which may lead to irritation or infection.
Regular ear checks help you notice problems early. By cleaning your cat’s ears when needed, you can prevent small issues from turning into serious health concerns. Ear care also helps your cat feel more relaxed and less itchy, improving their quality of life.

Understand Your Cat’s Ears Before Cleaning
Before cleaning, it is important to understand what healthy cat ears look like. A healthy ear is light pink inside, clean, and free from strong odor. A small amount of light-colored wax is normal and does not always mean cleaning is needed.
Some cats naturally produce more wax than others. Breeds with folded or hairy ears may need more frequent checks. Knowing what is normal for your cat makes it easier to spot changes that may need attention.

Know When Your Cat Needs Ear Cleaning
Not every cat needs regular ear cleaning. Cleaning too often can irritate the ears and cause dryness. Signs that your cat may need ear cleaning include visible dark wax, dirt, an unpleasant smell, frequent head shaking, or scratching at the ears.
If you notice redness, swelling, discharge, or your cat seems to be in pain, do not attempt to clean the ears at home. These signs may indicate an infection, and a veterinarian should examine your cat before any cleaning is done.

Step 1: Prepare a Calm Space and Gather Supplies
The first step is to choose a quiet and comfortable place where your cat feels safe. A calm environment helps reduce anxiety and makes the process smoother. Avoid noisy areas or places with distractions.
Gather all supplies before you begin. You will need a soft cloth or cotton pad and a cat-safe ear cleaning solution recommended by a veterinarian. Never use cotton swabs, as they can push debris deeper into the ear and cause injury.

Step 2: Help Your Cat Feel Relaxed
Before touching your cat’s ears, spend a few moments helping them relax. Gently pet your cat and speak softly to create a calm mood. If your cat is already relaxed, they are more likely to cooperate.
Some cats may feel nervous during grooming. Lightly wrapping your cat in a towel can help limit sudden movements and make them feel secure. This also protects you from scratches while keeping your cat comfortable.

Step 3: Check the Ears Carefully
Take a close look at your cat’s ears before cleaning. Gently lift the ear flap and examine the inside. Healthy ears should look clean and pale pink with no strong smell.
Look for dirt, dark wax, or debris. If you notice anything unusual such as redness, swelling, sores, or thick discharge, stop immediately. These signs may require medical treatment, and cleaning could make the problem worse.

Step 4: Apply the Ear Cleaning Solution
Hold your cat’s ear gently but firmly. Place a few drops of the ear cleaning solution into the ear canal, following the instructions on the product. Be careful not to touch the bottle tip to the ear to avoid contamination.
After applying the solution, gently massage the base of the ear for several seconds. You may hear a soft squishing sound, which is normal. This massage helps loosen wax and dirt inside the ear.
Step 5 Allow Your Cat to Shake Their Head
Once the solution has loosened the debris, allow your cat to shake their head naturally. This movement helps bring dirt and wax out toward the outer ear where it can be wiped away easily.
Stand back during this step, as some solution may splatter. Head shaking is an important and natural part of the cleaning process and helps make the ear cleaning more effective.
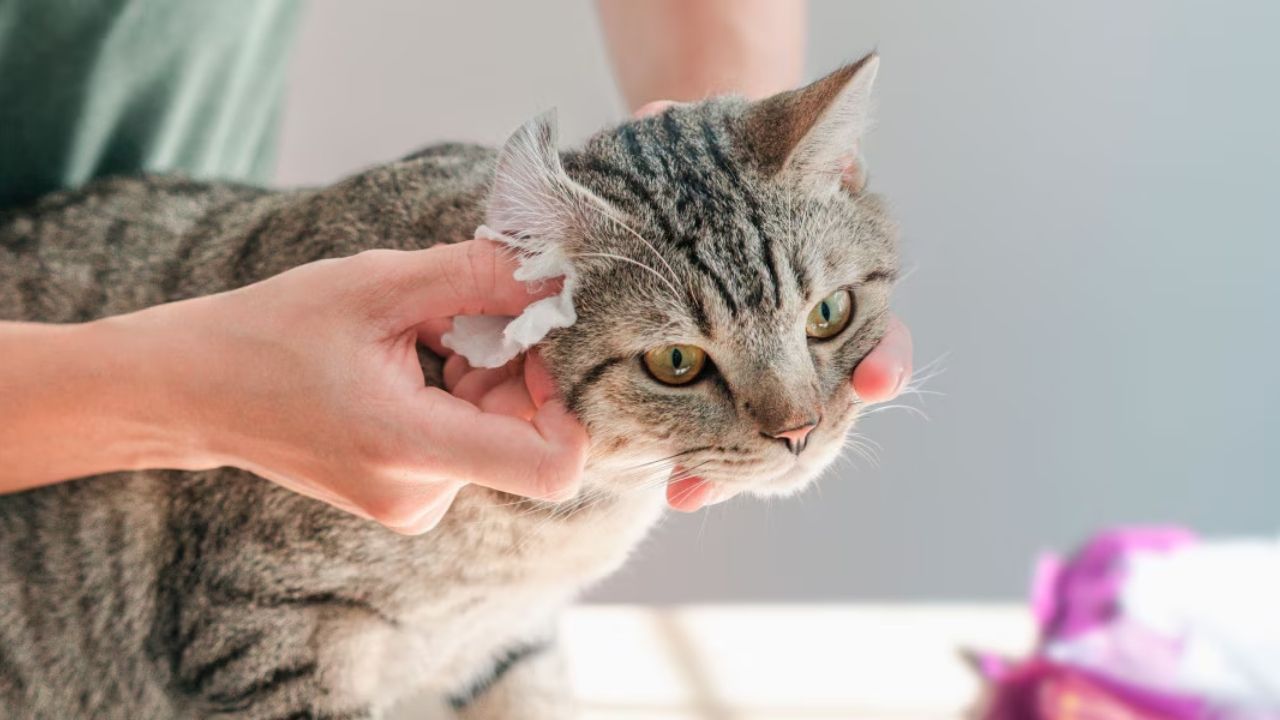
Step 6: Gently Wipe Away Dirt and Wax
Using a soft cloth or cotton pad, gently wipe the visible dirt and wax from the ear flap and outer ear. Clean only what you can see and avoid pushing anything deeper into the ear canal.
Be gentle and patient during this step. If your cat becomes uncomfortable or tries to pull away, take a short break. Never force the cleaning, as this can cause fear or injury.
Step 7: Reward Your Cat After Cleaning
Once you finish cleaning your cat’s ears, reward them with a treat, gentle praise, or playtime. Positive rewards help your cat associate ear cleaning with good experiences.
Over time, this positive approach can make ear cleaning easier and less stressful. Your cat will learn that the process is safe and followed by something enjoyable.
How Often Should You Clean Your Cat’s Ears
Most cats only need ear cleaning once a month or when visible dirt appears. Over-cleaning can irritate the ears and remove natural oils that protect the skin.
Regular ear checks during grooming sessions help you decide when cleaning is necessary. Each cat is different, so adjust the frequency based on your cat’s needs and veterinarian advice.
Common Mistakes to Avoid When Cleaning Cat Ears
One common mistake is using cotton swabs, which can push debris deeper into the ear and cause damage. Another mistake is using products not designed for cats, such as alcohol or hydrogen peroxide.
Cleaning ears too often or when there is an infection can also cause harm. Always use gentle methods and stop if your cat shows signs of pain or distress.
Tips to Make Ear Cleaning Easier Over Time
Start handling your cat’s ears gently from a young age so they become comfortable with touch. Short, calm grooming sessions help build trust and reduce fear.
Keeping a calm attitude and moving slowly makes a big difference. The more relaxed you are, the more relaxed your cat will be during ear cleaning.
Conclusion
Cleaning your cat’s ears is an important part of keeping them healthy and comfortable. By following these seven simple steps and using a gentle approach, you can safely remove dirt and wax without causing stress.
Regular ear checks, patience, and proper care help prevent infections and discomfort. With time and positive reinforcement, ear cleaning can become a normal and stress-free part of your cat’s grooming routine, ensuring a happy and healthy life for your feline companion.